
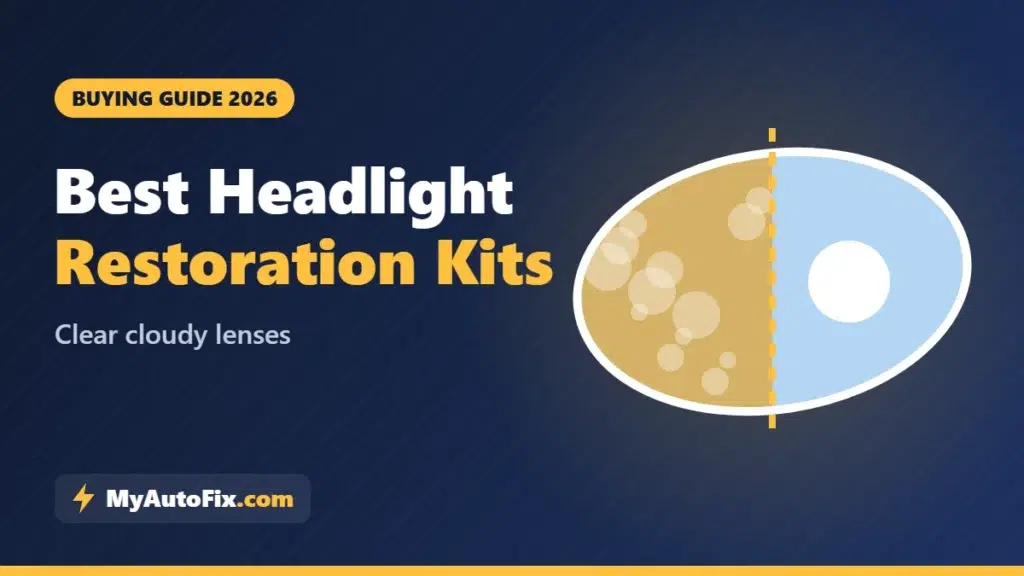
Car Care · Buying Guide
6 Best Headlight Restoration Kits: Clear Foggy Headlights for Good
By Mozammel HussainUpdated October 30, 202615 min read
As an Amazon Associate I earn from qualifying purchases. We may earn a commission if you buy through links on this page, at no extra cost to you. Learn more.
Cloudy, yellow headlights make any car look older than it is, but the real problem is safety. Oxidized lenses scatter light, cut how far you can see at night and can dazzle other drivers. A replacement headlight assembly can cost hundreds of dollars per side, while a good restoration kit costs about the same as a takeout dinner. The catch is that many quick fixes look great for a few weeks and then go yellow again. We compared the most popular kits on Amazon and explain which ones remove oxidation properly and, just as important, protect the lens afterward.
How we chose: we compared what each kit includes (sanding grits, compounds, UV protection), whether it needs a drill, how long the protective coat is expected to last and long-term owner feedback. We haven't restored headlights with each of these kits in our own garage for this guide, so our scores reflect research rather than hands-on testing. For official background, see IIHS headlight research.
Key takeaways
- Headlight haze is mostly failed factory UV coating and oxidized plastic. Polish alone only removes light haze.
- Kits that include wet sanding plus a UV-blocking clear coat last far longer than polish-and-wax kits.
- Prep matters: mask off the paint and sand evenly until the lens is uniformly frosted before polishing or coating.
- Restore before the lenses crack or yellow inside. Internal fogging or moisture means the housing, not the lens surface, is the problem.
Our Top Headlight Restoration Kit Picks at a Glance
- Best OverallCERAKOTE Ceramic Headlight Restoration KitCheck Price
- Easiest Hand-AppliedSYLVANIA Headlight Restoration KitCheck Price
- Best for Hand or Drill3M Auto Restore and Protect Headlight Restoration KitCheck Price
- Best for Heavy Yellowing3M Ultra Headlight Restoration KitCheck Price
- Best BudgetTurtle Wax Headlight Restoration KitCheck Price
In this guide
- Headlight Restoration Kit Comparison
- The Best Headlight Restoration Kits, Reviewed
- Why Headlights Turn Yellow and Foggy
- How to Restore Headlights: Step by Step
- How to Make Restored Headlights Last Longer
- When to Replace Headlights Instead
- Other Ways to Improve Night Visibility
- Restore or Replace? What Each Option Costs
- Real-World Headlight Restoration Tips
- Headlight Restoration Mistakes to Avoid
- FAQ
Headlight Restoration Kit Comparison
Results depend on lens condition and prep. Heavily cracked or internally fogged headlights may need replacement.
| Kit | Method | Drill needed | UV protection | Best for |
|---|---|---|---|---|
| CERAKOTE Ceramic Kit | Wipes + hand sanding + ceramic coat | No | Ceramic coating | Longest-lasting results |
| Sylvania Restoration Kit | Activator + sanding + compound + UV clear coat | No | UV-block clear coat | Easy hand-applied kit |
| 3M Auto Restore and Protect | 1000/3000 grit discs + clear coat wipes | Optional | Clear coat wipes | Hand or drill users |
| 3M Ultra Kit | 500/800 grit drill discs + compound + wax | Yes | Wax protectant | Heavy yellowing |
| Turtle Wax Restoration Kit | Sanding pads + compound + sealing wipe | No | Sealing wipe | Budget option |
| Meguiar's PlastX (6-pack) | One-step plastic polish | No (optional) | None | Light haze and upkeep |
The Best Headlight Restoration Kits, Reviewed
1. CERAKOTE Ceramic Headlight Restoration Kit
Our score: 4.7/5Sold as: 3-step kit, no tools
CERAKOTE's kit has become a favorite because it finishes with a ceramic coating designed to chemically bond to the lens, rather than a wax that wears off. It's also entirely hand-applied, so there's no risk of a drill pad burning the plastic.
- Includes8 oxidation-removing wipes, sanding kit, 2 ceramic coating wipes
- ToolsNo power tools required
- ProtectionCeramic coating with UV protection
- TimeAbout 30 minutes (CERAKOTE figure)
The process is simple: wipes to remove oxidation, sanding to level the lens, then the ceramic coating wipe. CERAKOTE claims the coating lasts as long as you own the vehicle; real-world life depends on sun exposure and care, but a bonded coating is a major step up from wax.
The key to a good result is thorough sanding. Take your time with the sanding stage until the whole lens looks evenly frosted, then apply the coating in a single, even pass without going back over it.
What we like
- Long-lasting ceramic UV coating
- No drill required
- Clear, simple steps
- Good value for the durability
Watch out for
- Coating must be applied carefully in one pass
- Hand sanding takes effort on badly yellowed lenses
Verdict: The best headlight restoration kit for long-lasting results.
Check Price on Amazon2. SYLVANIA Headlight Restoration Kit
Our score: 4.5/5Sold as: Hand kit with UV clear coat
Sylvania's kit includes everything for two headlights: a surface activator, sandpaper, a clarifying compound and a UV-block clear coat. It's a dependable, hand-applied option from a lighting brand.
- IncludesSurface activator, sandpaper, clarifying compound, UV block clear coat
- ToolsNo drill required
- ProtectionUV block clear coat
- CoverageTwo headlight lenses
The activator softens oxidation, the sandpaper levels it, the compound restores clarity and the clear coat adds protection. It's a well-rounded kit for moderate yellowing and a good choice for first-timers.
What we like
- Includes UV block clear coat
- Easy to follow
- No drill needed
Watch out for
- More effort than drill kits on heavy oxidation
- Single-use kit
Verdict: A straightforward, dependable hand-applied kit.
Check Price on Amazon3. 3M Auto Restore and Protect Headlight Restoration Kit
Our score: 4.5/5Sold as: Discs + clear coat wipes
3M's Auto Restore and Protect kit uses fine Trizact refining discs and finishes with quick clear coat wipes. You can use it by hand or speed things up with a household drill.
- Includes1000 and 3000 grit Trizact discs, 2 clear coat wipes, foam pad
- ToolsHand or household drill
- ProtectionClear coat wipes
- UseHeadlights, taillights and fog lights
The fine grits suit light to moderate oxidation and leave a smooth surface for the clear coat. Using a drill saves time, but keep speed low and keep the disc moving to avoid heating the plastic.
What we like
- Fine Trizact discs
- Clear coat protection
- Hand or drill use
Watch out for
- Less aggressive for heavy yellowing
- Drill technique matters
Verdict: The best flexible kit for light to moderate haze.
Check Price on Amazon4. 3M Ultra Headlight Restoration Kit
Our score: 4.4/5Sold as: Drill kit
For badly yellowed lenses, 3M's Ultra kit brings coarser 500 and 800 grit discs, a compound and a wax protectant, designed for use with a household drill.
- IncludesDisc pad holder, 500 grit and 800 grit discs, finishing discs, compound, wax protectant
- ToolsHousehold drill
- ProtectionWax protectant
- ExtrasMasking tape
The coarser discs remove heavy oxidation quickly. The downside is protection: wax doesn't last as long as a clear coat or ceramic. For the best of both, some owners use this kit for the sanding and finish with a UV clear coat.
What we like
- Removes heavy yellowing quickly
- Masking tape included
- Fast with a drill
Watch out for
- Wax protection is short-lived
- Needs a drill and care
Verdict: The best kit for severely yellowed lenses, ideally followed by a UV coating.
Check Price on Amazon5. Turtle Wax Headlight Restoration Kit
Our score: 4.3/5Sold as: Hand kit with sealing wipe
Turtle Wax's kit is an affordable all-in-one option with sanding pads, compound and a sealing wipe for UV protection.
- IncludesPrecision sanding pads, compound and sealing wipe
- ToolsNo drill needed
- ProtectionSealing wipe for UV defense
- UseCars, trucks and SUVs
It's a good-value choice for moderate haze. As with any kit, the sanding stage is where results are made; take your time before polishing.
What we like
- Low price
- Includes sealing wipe
- No tools needed
Watch out for
- Protection not as durable as ceramic
- Single-use
Verdict: A good budget kit for moderate haze.
Check Price on Amazon6. Meguiar's PlastX Clear Plastic Cleaner and Polish (6-Pack)
Our score: 4.3/5Sold as: One-step polish, 6 x 10 oz
PlastX is a one-step polish for light haze, fine scratches and upkeep. It's not a full restoration kit, but it's a useful product for lenses that are only slightly dull, and the 6-pack is good value for detailers or multi-car households.
- TypeOne-step clear plastic cleaner and polish
- Size6 bottles, 10 oz each
- UseUncoated clear plastics, headlights, taillights
- ProtectionNone
Use it by hand or with a polisher for light haze. Because it doesn't add UV protection, follow up with a sealant or UV coating if the lens has been sanded. For yellowed lenses, choose a full kit.
What we like
- Great for light haze and upkeep
- Large value pack
- Works on many clear plastics
Watch out for
- No UV protection
- Not enough for heavy oxidation
Verdict: A useful polish for light haze and maintenance, not a full restoration.
Check Price on AmazonWhy Headlights Turn Yellow and Foggy
Modern headlight lenses are polycarbonate, a tough plastic that is coated at the factory with a UV-resistant hard coat. Over years of sun, heat and road grit, that coating breaks down. The exposed plastic then oxidizes, turning cloudy and yellow. Car washes with harsh chemicals and parking outdoors speed this up.
Restoration removes the damaged surface and replaces the lost protection. Skip the protection step and the bare plastic can yellow again within months.
How to Restore Headlights: Step by Step
- Wash and dry the lens. Remove dirt and wax so sandpaper and coatings work properly.
- Mask the surrounding paint. Use painter's tape around the lens. It's easy to scuff paint while sanding.
- Sand evenly. Wet-sand with the kit's coarsest grit until the whole lens is uniformly frosted and the yellow is gone, then move through finer grits.
- Polish or clarify. Use the kit's compound or polish until clear. Wipe clean.
- Apply UV protection. Apply the clear coat, ceramic coat or sealant exactly as directed, usually in one smooth pass.
- Let it cure. Keep the lens dry and avoid touching it for the cure time stated in the instructions.
Tip: work in shade on a cool lens. Coatings applied in direct sun can streak or cure unevenly.
How to Make Restored Headlights Last Longer
- Choose a kit with a UV coating rather than wax only.
- Park in shade or a garage when possible.
- Use a gentle car wash soap and avoid harsh degreasers on the lenses.
- Add a UV sealant every few months if your kit used wax.
- Inspect twice a year and touch up early haze before it becomes yellowing.
When to Replace Headlights Instead
- Moisture or fog inside the lens means a failed seal. Restoration won't fix it.
- Deep cracks or crazing in the plastic.
- Damaged reflectors that look burned or flaking.
- Broken mounting tabs that let the headlight move.
After restoring or replacing headlights, check the aim. A poorly aimed headlight can dazzle other drivers even when the lens is perfectly clear.
Other Ways to Improve Night Visibility
Clear headlights are only one part of seeing well at night and in rain. Clean the inside of the windshield, replace streaking wipers and fix chips before they spread. See our guides to fixing streaking wiper blades, replacing worn-out wipers and using a windshield repair kit.
Restore or Replace? What Each Option Costs
| Option | Typical cost | Time | Best for |
|---|---|---|---|
| DIY restoration kit | About the price of a takeout meal | 30–60 minutes per pair | Yellowed or hazy lenses in good condition |
| Professional restoration | Often several times the cost of a kit | About an hour | Owners without time or tools |
| Aftermarket headlight assembly | Varies widely by car | An hour or more per side | Cracked lenses or internal fogging |
| OEM headlight assembly | Often the most expensive, especially LED units | An hour or more per side | Damaged housings on newer cars |
For most cars older than five years, restoration is the obvious first step. If the lens is clear afterward but the beam still looks dim, the reflector or bulbs may be worn; replacing bulbs in pairs keeps the light color and brightness even.
Real-World Headlight Restoration Tips
- Test on one headlight first. Learn the process on one side before doing both.
- Keep the lens wet while sanding. A spray bottle of water stops clogging and gives an even frost.
- Pick a dry, mild day. High humidity and cold slow coatings and can cause haze.
- Wipe the lens with isopropyl alcohol before coating to remove compound residue so the coating bonds properly.
- Let it cure before washing. Most coatings need hours to a day before rain or washing; check your kit.
Headlight Restoration Mistakes to Avoid
- Skipping the UV coat. Lenses yellow again quickly.
- Uneven sanding. Leaves patches of haze that polish can't remove.
- Using a drill too fast. Heat can damage the plastic.
- Not masking paint. Sandpaper scratches paint quickly.
- Using toothpaste or bug spray hacks. They may help briefly but strip protection and don't last.
More Product Reviews
6 Best Portable Level 1 EV Chargers of 2026 (120V & Dual-Voltage)
The best portable Level 1 EV chargers for 120V outlets, plus dual Level 1/2 models with NEMA 6-20 plugs. Charging speeds, outlet…
Read guide →
7 Best EV Jack Pads for Tesla and Other EVs (2026 Guide)
The best EV jack pads for Tesla and other electric cars: puck adapters and pinch weld pads compared, 24mm vs 19mm fitment,…
Read guide →
6 Best NACS to J1772 Adapters (Tesla to J1772) for 2026
Charge a J1772 EV at Tesla Wall Connectors and Destination Chargers. We compare the best NACS to J1772 adapters from Lectron, EVDANCE…
Read guide →Frequently Asked Questions
Do headlight restoration kits really work?
Yes, when you sand thoroughly and apply a UV-protective coat. Polish-only fixes work briefly but often fade.
How long do restored headlights last?
It depends on the protection used and sun exposure. Wax-protected lenses may yellow within months, while UV clear coat or ceramic coatings typically last much longer.
Which headlight restoration kit lasts the longest?
Kits with a bonded UV clear coat or ceramic coating, such as the CERAKOTE Ceramic Kit, generally last longer than kits finished with wax.
Do I need a drill to restore headlights?
No. Hand kits like CERAKOTE and Sylvania work well. A drill speeds up heavy sanding but requires care.
Can toothpaste restore headlights?
Toothpaste is a mild abrasive that may reduce light haze briefly, but it doesn't add UV protection and won't fix heavy yellowing.
Why do my headlights get foggy inside?
Internal fog means moisture is getting into the headlight housing through a failed seal or crack. Restoration won't fix it.
The Bottom Line
For the longest-lasting results, the CERAKOTE Ceramic Headlight Restoration Kit is our top pick. If you prefer a simple hand-applied kit with a UV clear coat, choose Sylvania. For severely yellowed lenses and a drill, the 3M Ultra kit removes oxidation fastest.
Check CERAKOTE Price Check Sylvania Price Check 3M Ultra Price
Related guides
Mozammel writes maintenance guides and product research for My Auto Fix, focusing on DIY diagnostics, tools, tires and EV care. About our editorial process.